Welcome to Computational Problem Solving in the Chemical Sciences! This course is designed to equip you with the skills to tackle a wide range of problems in chemistry, chemical engineering, chemical physics, chemical biology, and beyond, using modern numerical tools. While we will primarily focus on Python—a language highly valued in today’s workforce—it’s important to recognize that there are many other tools at your disposal for solving problems in the chemical sciences.
These tools range from spreadsheet software like Excel and Google Sheets to specialized software packages with graphical user interfaces, such as Origin, Mathematica, and MATLAB. Additionally, other programming languages like R, Julia, and C++ are often employed for various scientific computing tasks.
As we progress through the course, you’ll not only learn the fundamentals of Python but also how to apply it to simulate matter at different scales, including techniques like Monte Carlo and molecular dynamics simulations. We’ll also touch upon Python’s use in quantum chemistry calculations, demonstrating its versatility and power across diverse areas of research.
By the end of this course, you’ll have a solid foundation in using Python to solve complex problems in the chemical sciences, preparing you for both academic research and industry applications.
Learning Objectives
By the end of this lecture, you should be able to:
Install Python and Jupyter Notebook on your computer.
Perform basic mathematical operations in Python.
Use Python to solve chemical problems, such as calculating molar masses and the number of moles.
Create basic plots using Python’s
matplotliblibrary.
Step 1: Getting Python Installed
Before we dive into using Python, you’ll need to have it installed on your computer. Python is available across all major operating systems, and installation is straightforward. Here’s how you can get started:
1.1 Download and Install Python
Visit the official Python website and download the latest version of Python 3 (we recommend version 3.8 or later).
Follow the installation instructions specific to your operating system.
1.2 Check if Python is Already Installed
Mac and Linux Users: Python typically comes pre-installed. To check, open a terminal and type:
python3 --versionIf a version number appears, you’re all set. If not, you’ll need to install Python from the website above.
Windows Users: Open a command prompt and type:
python --versionIf you see a version number, Python is installed. If you get an error, you’ll need to install Python.
1.3 Windows-Specific Note
During installation on Windows, make sure to check the box that says “Add Python to PATH.” This will make Python accessible from the command line.
Once Python is installed and verified, you’re ready to start coding!
Step 2: Installing Jupyter Notebook
Next, you’ll need to install Jupyter Notebook, a powerful tool that allows you to create and share documents containing live code, equations, visualizations, and narrative text.
2.1 Install Jupyter Notebook
For Mac and Linux Users: Open a terminal and type:
pip3 install jupyterIf pip3 doesn’t work, try:
python3 -m pip install jupyterFor Windows Users: Open a command prompt and type:
python -m pip install jupyterThis command ensures that Jupyter is installed using the version of Python you have on your system.
2.2 Launching Jupyter Notebook
After installation, you can start Jupyter Notebook by typing the following command in your terminal or command prompt:
jupyter notebookThis will automatically open a new tab in your default web browser, presenting the Jupyter interface. From here, you can create new notebooks, organize your projects, and start coding!
With Jupyter Notebook installed, you’re now ready to start exploring Python interactively!
Step 3: Let’s Get Started with Python
3.1 Python and Mathematics
Python is a versatile programming language that excels at solving a wide range of problems in the chemical sciences, particularly when it comes to mathematical computations. Whether you’re performing simple arithmetic or tackling more advanced calculus, Python is equipped to handle it all.
Let’s start with some basic math operations in Python:
Addition: You can add two numbers easily:
2 + 24Multiplication: Multiplication is just as straightforward:
3 * 412Python supports a variety of mathematical operations, including:
Subtraction:
a - bDivision:
a / bExponentiation:
a ** b(which gives )
Python’s capabilities extend far beyond basic arithmetic. For example, to calculate the square root of a number, you can use the math module:
import math
math.sqrt(9)3.0In this example, you’ve seen your first instance of importing a module in Python. The import statement allows you to bring additional functionality into your Python programs. In this case, by importing the math module, you gain access to a suite of mathematical tools that go beyond basic operations.
Once imported, you can use any function from the module by prefixing it with math. For instance, math.sqrt() is the function to compute the square root.
3.2 Practice Exercises
Let’s put this into practice with a couple of exercises:
Exercise 1: Calculate the value of using Python.
Hint
You can use the
**operator for exponentiation.Exercise 2: Calculate the value of using Python.
Hint
Remember to use the
math.sqrt()function for square roots.
3.3 Python Can Do Chemistry
Python is not just a powerful tool for mathematics; it can also be used to solve a wide range of problems in chemistry. Whether you’re performing basic stoichiometric calculations or exploring complex quantum chemistry, Python has you covered.
For example, let’s calculate the molar mass of carbon dioxide (CO):
carbon_mass = 12.011
oxygen_mass = 16.00
molar_mass = carbon_mass + 2 * oxygen_mass
molar_mass44.010999999999996In this example, you’ve encountered your first use of variables in Python. A variable is simply a name that refers to a value. You can use variables to store values and perform calculations. In this case, we stored the atomic masses of carbon (carbon_mass) and oxygen (oxygen_mass) as variables, and then used these to calculate the molar mass of CO.
Python can also help you determine the number of moles of a compound:
mass = 10.0
molar_mass = 44.01
moles = mass / molar_mass
moles0.22722108611679165As you can see, Python allows you to easily perform all kinds of chemical calculations. Each variable in Python has a data type, which determines the kind of data it can hold. In the above example, mass and molar_mass are of type float, meaning they represent real numbers. The result of the division operation (moles) is also a float.
You can determine the data type of any variable using the type() function:
type(mass)float3.4 Practice Exercises
Exercise 1: Calculate the molar mass of water (HO) using Python.
Hint
Remember that the atomic masses of hydrogen and oxygen are approximately 1.008 and 16.00, respectively.
Exercise 2: Calculate the number of moles of water (HO) in 100.0 grams of the compound using Python.
Hint
Use the molar mass you calculated in the previous exercise.
3.5 Python Can Do Graphing
Before we start creating plots, you’ll need to ensure that Matplotlib is installed on your computer. Matplotlib is a popular plotting library in Python that you’ll be using frequently for data visualization. To install Matplotlib, open your terminal or command prompt and type the following command:
pip install matplotlibIf you’re using a Jupyter Notebook, you can install Matplotlib directly within the notebook by running:
!pip install matplotlibOnce Matplotlib is installed, you’re ready to start creating plots in Python. Let’s start with a simple example of a line plot:
import matplotlib.pyplot as plt

x = [1, 2, 3, 4, 5]
y = [1, 4, 9, 16, 25]

plt.plot(x, y)

plt.xlabel('$x$')
plt.ylabel('$y$')
plt.title('$y = x^2$')

plt.show()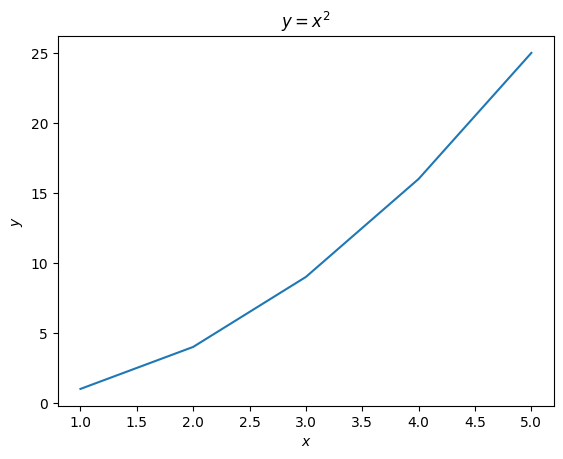
In the first line, we encounter a new syntax: import matplotlib.pyplot as plt. This statement means, “import the pyplot module from the matplotlib library and give it the alias plt.” The pyplot module is part of the matplotlib library, which is a powerful tool for creating a wide variety of graphs and plots.
In this example, we use the plot() function to create a line plot of the function . We then use xlabel(), ylabel(), and title() to label the x-axis, y-axis, and add a title to the plot, respectively. Finally, show() is used to display the plot.
Python offers several libraries for creating graphs and plots, each with its own strengths and use cases:
matplotlib: Great for creating basic plots like line plots, scatter plots, and bar plots.seaborn: Built on top ofmatplotlib, it offers enhanced statistical plotting and a more attractive default style.plotly: Ideal for creating interactive and complex plots, including 3D plots.
You might find yourself experimenting with different libraries to determine which one best fits your specific needs.
3.6 Practice Exercises
Exercise 1: Create a line plot of the function for using Python.
Hint
Modify the
yvalues to reflect the function .Exercise 2: Create a scatter plot of the function for using Python.
Hint
Use the
scatter()function frompyplotto create the scatter plot.Challenge: Create a plot that shows both and on the same graph. Use different colors and add a legend to differentiate between the two lines.
Hint
You can use the
plot()function twice to plot both functions on the same graph. Use thelegend()function to add a legend.
3.7 Python Can Do More
Python’s versatility extends far beyond what we’ll cover in this course. As you continue your journey in the chemical sciences, you’ll find Python to be an invaluable tool for tackling a wide array of problems. Here’s a glimpse of what Python can help you achieve:
Statistical Analysis of Data: Python can handle complex statistical analyses with ease, using powerful libraries such as:
numpy: For numerical operations and array processing.scipy: For advanced scientific computations, including statistics.pandas: For data manipulation and analysis, particularly with tabular data.statsmodels: For statistical modeling and testing.scikit-learn: For machine learning and predictive modeling.
Simulating Matter: Python also excels in simulating matter, which is crucial for research in the chemical sciences. Key libraries include:
ase: The Atomic Simulation Environment for setting up, manipulating, running, visualizing, and analyzing atomistic simulations.pyscf: For quantum chemistry and electronic structure calculations.quacc: An automated workflow engine for quantum chemistry and materials science.pymatgen: The Python Materials Genomics library, useful for materials analysis.cantera: For thermodynamic, kinetic, and transport properties of chemical reactions.
And Much More: The possibilities with Python are vast. For more resources and tools specifically tailored to chemistry, check out the awesome
-python -chemistry repository.
This concludes our first lecture. As you move forward, practice is key to mastering Python’s powerful capabilities. Don’t hesitate to experiment with the code, try out the exercises, and explore additional resources to deepen your understanding. Welcome to the world of computational problem-solving in the chemical sciences!